Check out my latest post on Multi Stage Pipelines & Azure DevOps
My latest project utilized automated builds to speed up the deployment life cycle. We are running in an agile process and wanted to leverage continuous integration to help the product owners see new features as soon as possible. What follows is a quick walkthrough of the steps/tasks to get a basic build definition setup using TFS and Visual Studio.
Before we get started we need to ensure we have installed some prerequisites. Make sure you have the following:
- TFS installed with a Team Project and your project source code checked in.
- Build Controller installed with a Build Agent. More information on this can be found here.
- Ensure all software required for build is installed on the same machine as the Build Agent, including Visual Studio.
- Visual Studio must also be installed on your local development environment.
- A network share location to place the code drops (i.e. built code).
- A domain is not required but is highly recommended for secure access to network locations.
The example that follows is using TFS 2012 and Visual Studio 2012. However, this process will most likely apply to future versions (I have seen no differences if using either TFS 2013 preview or Visual Studio 2013).
To get started I first need to create a new build definition. This will be the basis for how a build is completed. In order to create a new build definition, I open Visual Studio, navigate to Team Explorer, and then to the Builds section.
In the figure below, I don’t have any build definitions for this project. However I can change this by selecting the “New Build Definition” selection from the Builds menu.
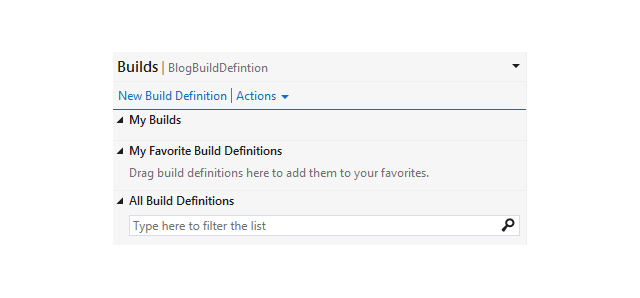
Figure 1 – Team Explorer – Builds Tab
A new menu will appear, this is where we will need to configure our build definition. First, in the General tab, give your build definition a name and an optional description. I’m going to call mine Blog Build Definition CI, and give a definition of “Sample build definition for my blog post”. A “Queue Processing” option must be selected as well. We are going for a continuous integration set-up, so select “Enabled”.
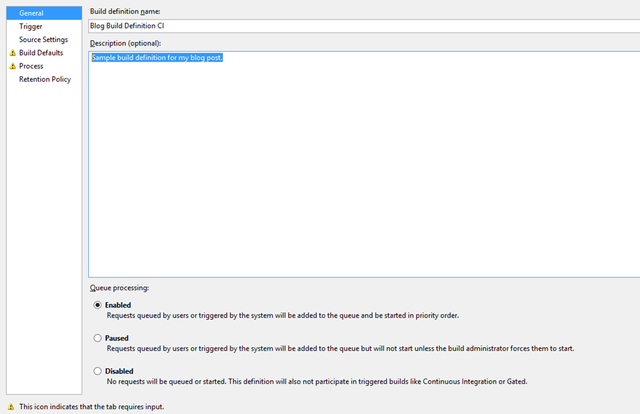
Figure 2 – New Build Definition – General Tab
Next we need to select the trigger for the build definition. This can be found in the Trigger tab. Here we want to select the best option for a continuous integration setup. Depending on your team or situation, you may opt to use “Rolling builds” or “Gated Check-in” but “Continuous Integration” is likely adequate for most environments.
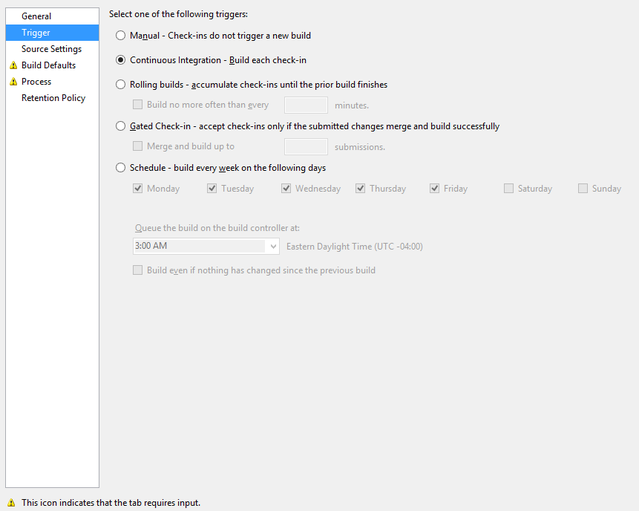
Figure 3 – New Build Definition – Trigger Tab
Then we move onto Source Settings. Source Settings can be a little bit tricky but is straight forward once you gain an understanding of what is being asked. Source Control Folder is used to select what source the build will be acting on. You can see that I selected my “BlogBuildDefinitionProject” folder as my source. Build Agent Folder can be a bit confusing. During the build, the controller is going to grab the source code files from TFS and send them to the build agent. The Build Agent Folder refers to the location on the Build Agent’s server that the files will be sent to. “$(SourceDir)” is a variable used by TFS as a starting point for source drops. The article List of Variables Like $(SourceDir) gives a good explanation of what the variable is:
$(SourceDir) – Expands to $(BuildDir)\Sources by default
The directory “Sources” is not hard-coded and may be changed by modifying the TfsBuildService.exe.config file on the build agent. If you open that file there will be an application setting called “SourcesSubDirectory”. If you need a shorter path you may change this key to something like “s” instead of “Sources”. If you made this change then the $(SourceDir) variable would expand to $(BuildDir)\s
For the purposes of this example I only have one solution I’m building, so keeping the default is fine. However, if you want to build multiple solutions, each location will need its own source directory. You should keep all the source locations pre-pended with “$(SourceDir)” and append them with “/project1″ or more likely the name of your solution.
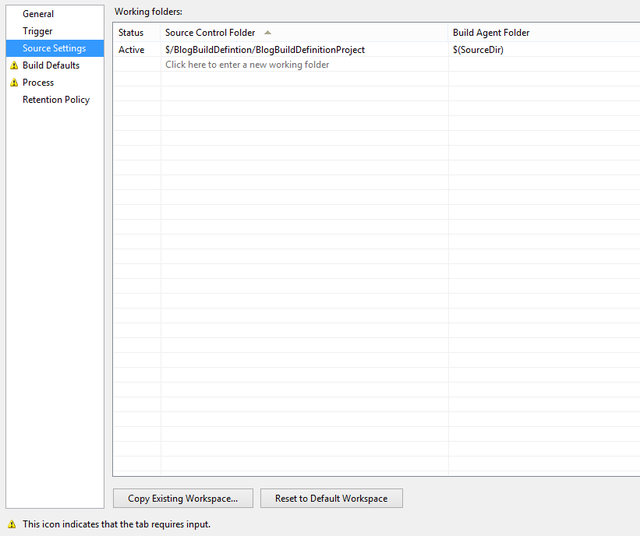
Figure 4 – New Build Definition – Source Settings
Build Defaults is next, and is a fairly simple screen. We need to select the Build Controller we are going to use. I defined my controller very quickly (see #2 in the list of prerequisites at top). You can see it is named “TeamFoundation” and has no description. Most likely you will only have one controller. Under “Staging Location” you will only have two options unless you are creating a build definition for Team Foundation Service where a third option will be presented. That third option is out scope of this article so we will focus on the two that are given for full featured Team Foundation Server Installations. The first selection is used when your build process for whatever reason doesn’t need to copy files to a drop location. The second one is the standard option and will require you to put in the network address of the network share you created earlier (see #5 in list of prerequisites at top). Remember that the Build Agent that was configured for use with TFS will need to have full access to this folder.
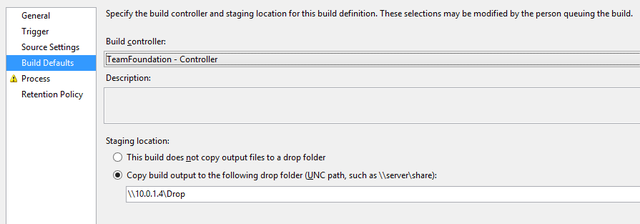
Figure 5 – New Build Definition – Source Settings
The Process section is the meat of your build definition. This is where you can dictate the steps and set up a “Build Template”. There is a lot of information that could be explained here, especially when talking about creating build templates. Custom build processes are something I want to cover further in a future post but will be skipped over for now. The default template that is created whenever a new Team Project is created is more than suitable for a basic continuous integration deployment. The default build process template is pre-selected for you, however, you can select “New…” in order to start the creation of your own. The most important part is to select the Items to Build.
For this example (see screen shot below) I selected the solution of my “BlogBuildDefinitionProject”. The defaults for Automated Tests are normally adequate enough to get tests run before your code is built on the server, however, you can also define a string that will be used to find your test projects. It’s important to realize that if using the default, any .dll file with the word “test” in the file name will be searched for test classes and methods and these tests will then be run. Furthermore, if your test project names don’t already contain the word “test”, you will need to either alter this string to something that is common between your test projects’ names, or change the names of your test projects.
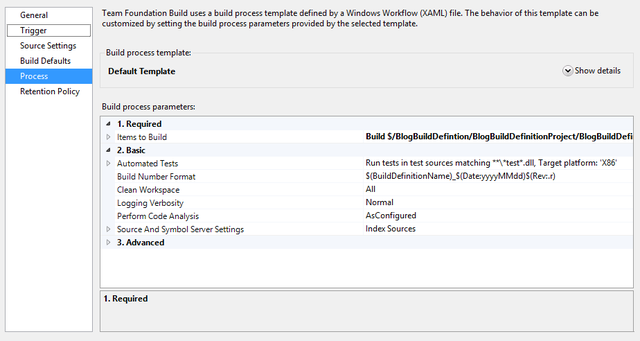
Figure 6 – New Build Definition – Process
Retention Policy really isn’t very important. It’s just a definition as to how long certain types of builds should be kept. Depending on how the build is triggered you can keep those files for a specified amount of time. Normally the defaults are sufficient for any project you have on the go.
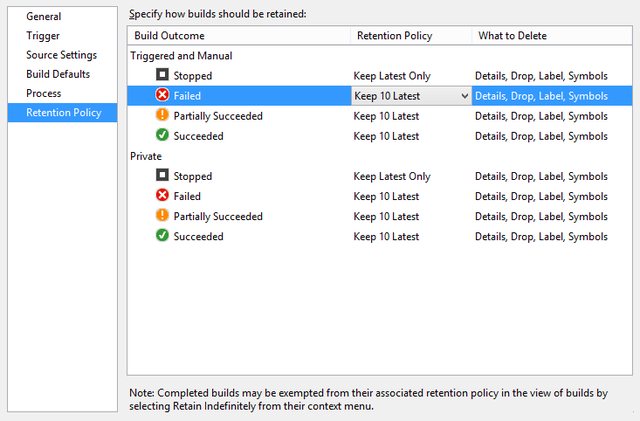
Figure 7 – New Build Definition – Retention Policy
Make sure you save, and upon saving successfully you will see in your Team Explorer Builds tab that you now have a build definition present.
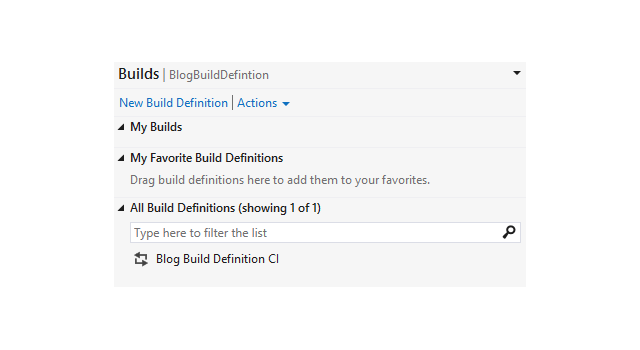
Figure 8 – Team Explorer – Builds with Definition
Next time you check in your code you will see a build under “My Builds”. Give it a few minutes and you will get a log of the events that transpired.

Figure 9 – Team Explorer – Builds New Build
Building up the perfect deployment solution can take time, however when it’s done you will be able to create new builds in seconds. It really is great and has saved many hours trying to get products to launch.
If you have any questions, or want to chat more about this, contact us today – we’d love to hear from you!